Categories
Community

Advanced git: Demystifying git Remotes and git cherry-pick: Powerful Tools for Collaboration

Collaboration is key in the world of Git version control. But keeping track of changes from multiple developers can get tricky. This blog post dives into two essential Git features—remotes and cherry-pick—that empower you to streamline your workflow and effectively manage contributions.

Understanding Git Remotes: A Bird’s Eye View

By default, your GitHub repository typically has a single remote—the origin, representing the main repository you cloned from. However, in larger projects with multiple developers, things get more interesting. Often, developers create personal forks before they push their code.This allows them to work on a separate copy of the code base, and once they are satisfied with the changes, they can merge back into the main codebase.

Here’s where remotes come into play. They are references to additional copies of your Git repository, potentially containing valuable contributions from other developers.


NEW Developer Nation survey is live! Participate, shape the trends in software development, and win big. Start here!


Let’s use an Open-Source project: Lottie

Imagine we’re working with the fantastic Lottie by Airbnb, a library that renders After Effects animations on mobile platforms. We’ve cloned a fork (iayanpahwa/lottie-android) and want to explore changes made by other contributors to lottie (gpeal and felipecsl).
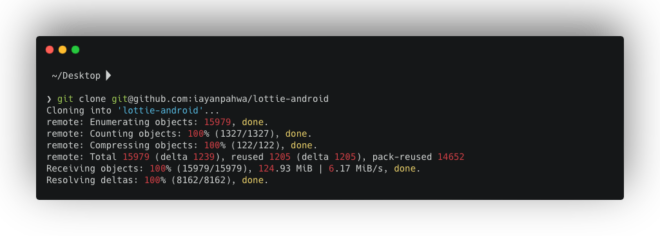
Adding Remotes: Reaching Out to Other Forks

To access these developers’ workspaces, we can add them as remotes using the git remote add command:

git remote add <remote_name> <repository_URL>

For example:

git remote add gpeal https://github.com/gpeal/lottie-android.git
git remote add felipecsl https://github.com/felipecsl/lottie-android.git

Now, using git remote -v, you can see all configured remotes, including their URLs.
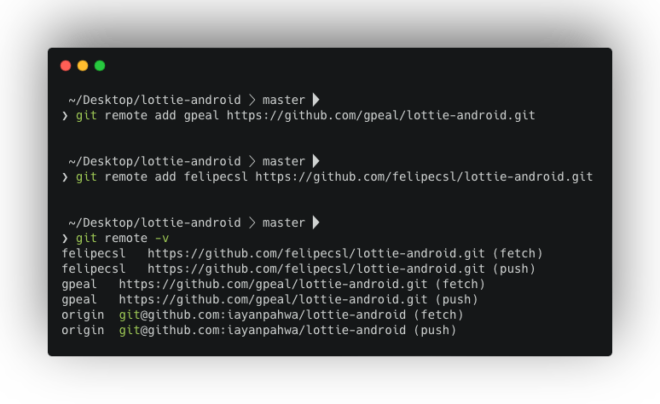
Fetching the Goods: Downloading Changes

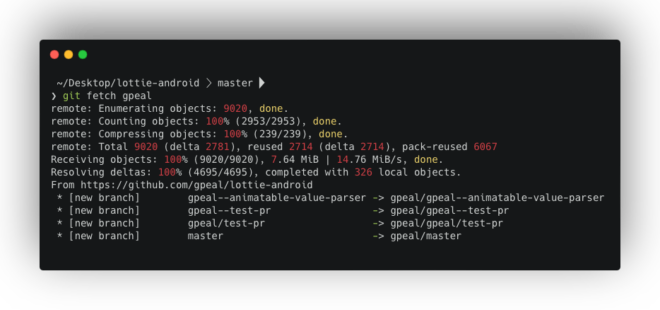
With remotes in place, we can retrieve changes from other contributors using git fetch.

  • Fetching from a specific remote:
  • Fetching from all configured remotes:
	git fetch --all

This downloads the commits made by these developers without integrating them into your local working directory yet.

git cherry-pick: Borrowing the Best Bits

Git cherry-pick allows you to meticulously select and apply specific commits from other branches (including those fetched from remotes) onto your current branch. This is particularly useful for integrating contributions from multiple developers, testing them individually, or incorporating specific fixes.

A Real-World Cherry-picking Scenario

Imagine you manage an open-source project that receives a wave of pull requests. You might want to test these contributions together before merging them. Here’s how cherry-picking can help:

Create a New Branch:

git checkout -b my-test-branch
  1. Fetch Necessary Code (if not already done): Use git fetch as explained earlier.
  2. Cherry-picking Commits: Once you have access to the desired commits, cherry-pick them one by one using their commit hashes:
git cherry-pick <commit_hash>

For instance, to test a specific commit (648c61f5275998c461347b5045dc900405306b31) by contributor gpeal:

git cherry-pick 648c61f5275998c461375647845dc900405306b31 [ commit made by gpeal ] 

This brings gpeal’s changes to your my-best-branch for isolated testing.

Remember: Cherry-picking can rewrite history, so use it cautiously. Always create a dedicated branch for testing before integrating changes into your main codebase.

Wrapping Up:

By mastering remotes and cherry-pick you can effectively collaborate on Git projects, leverage valuable contributions from others, and ensure a smooth and efficient development workflow.

Feel free to reach out with any questions! Happy coding! Do check our blogs on git internals for more learning: 

NEW Developer Nation survey is live! Participate, shape the trends in software development, and win big. Start here!

Categories
Community

Managing Complex Dependencies with Google’s repo tool

In my last blog, I discussed managing dependencies with git submodules. However, when working with large projects that have many dependencies, traditional methods like git submodules can become cumbersome. Google’s repo tool emerges as a powerful solution specifically designed to handle this challenge.

What is repo tool?

repo is an in-house dependency management tool developed by Google. It excels at managing many dependencies, making it ideal for projects like the Android Open Source Project (AOSP) and custom Android ROMs.

Unlike git submodules, which are an integrated git feature, repo functions as a separate executable script. This necessitates installation before diving in.

Installation (Choose your adventure!)

Linux: 

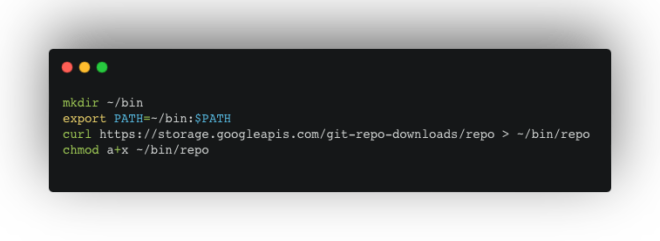
Create a directory for Repo:

mkdir ~/bin

Update your PATH environment variable:

export PATH=~/bin:$PATH

Download and make Repo executable:

curl https://storage.googleapis.com/git-repo-downloads/repo > ~/bin/repo
chmod a+x ~/bin/repo
Google repo tool

OSX:

Use Homebrew to install Repo:

brew install repo
Google repo tool

For other platforms, refer to official docs: https://gerrit.googlesource.com/git-repo

Manifest Magic: Defining Dependencies

Repo relies on a manifest file stored in a separate Git repository. This XML file is the central hub, outlining where to fetch project dependencies, their storage location, and specific revisions (commits).

The beauty of Repo lies in its ability to manage multiple manifests. Imagine a huge, complex project like the Android Operating system with 100 dependencies. You could create a dedicated “lib.xml” manifest to fetch those specific libraries, eliminating the need to include hundreds of unrelated dependencies from a broader manifest. Similarly, the testing and compliance team can have “qa.xml” and “compliance.xml” to manage extra QA and compliance-related dependencies separately, which might not be needed in production but required during development. Both could also have the same libraries but different versions. Hence repo using manifest.xml makes handling dependencies extremely flexible. 

For this demo, we’ll keep things simple with a single “default.xml” file.

Creating a Manifest

Clone the Example Repository having our manifest:

git clone git@github.com:iayanpahwa/manifest-demo.git

Examine the default.xml file:
This file specifies the main Project (ex, EazyExit) with two dependencies, FastLED and PubSubClient, along with their corresponding URLs, paths, and revision IDs.

<?xml version="1.0" encoding="UTF-8"?>
<manifest>

<remote fetch="https://github.com/iayanpahwa/" name="EazyExit" />
    
    <project name="FastLED.git" path="lib/FastLED" remote="EazyExit" revision="c1ab8fa86f6d6ecbf40ab7f28b36116a3c931916" />
    <project name="pubsubclient.git" path="lib/PubSubClient" remote="EazyExit" revision="dddfffbe0c497073d960f3b9f83c8400dc8cad6d" />

</manifest> 

Note: The manifest allows for various configurations, including project branches and alternative remotes (like Bitbucket or GitLab). Refer to the official documentation for a comprehensive list: https://gerrit.googlesource.com/git-repo/+/master/docs/manifest-format.md

Putting it All Together: Fetching Dependencies

  1. Push the default.xml file to your GitHub repository (if using the provided example).
  2. Create a project directory (e.g., EazyExit).

Navigate to your project directory and initialise Repo

Google repo tool

3. This command establishes the current directory as your project workspace.

Fetch dependencies using the repo sync command:

4. This command retrieves all dependencies specified in the manifest and stores them according to the defined paths.

By leveraging repo, you can effectively manage many dependencies within a single, streamlined workflow.

Repo empowers you to manage complex dependencies with ease, promoting a more flexible and adaptable development process. Checkout our other blogs on: 

NEW Developer Nation survey is live! Participate, shape the trends in software development, and win big. Start here!

Categories
Community

How Git Submodules Can Save You Time (and Headaches): Taming the Dependency Beast

In software development, we rarely build projects entirely from scratch. We leverage open-source libraries and frameworks to accelerate development and avoid reinventing the wheel. But managing these dependencies can quickly become a tangled mess, especially as projects grow and dependencies multiply.

This blog post explores a simple yet powerful Git feature called git-submodule, which streamlines dependency management and keeps your codebase clean and organised.

Git Submodules

NEW Developer Nation survey is live! Participate, shape the trends in software development, and win big. Start here!


The Downside of the Manual Approach

Many developers resort to simply manually cloning and directly pushing dependency code into their main project’s codebase. While this may seem convenient at first, it creates several challenges:

  • Version Control Issues: Updating dependencies becomes a manual process, increasing the risk of compatibility issues and security vulnerabilities.
  • Upstream Changes: New features or bug fixes in the original library require manual integration, which is time-consuming and error-prone.

Introducing Git Submodules

git submodules allow you to integrate external Git repositories (containing your dependencies) directly into your project. This creates a modular approach with several benefits:

  • Independent Updates: You can update submodules individually without affecting your main project code.
  • Version Tracking: Submodules track the specific commit hash of the dependency you’re using, ensuring consistency and reproducibility.
  • Modular Codebase: Your project remains clean and organised, with dependencies clearly separated from your core code.

Putting Git Submodules into Action

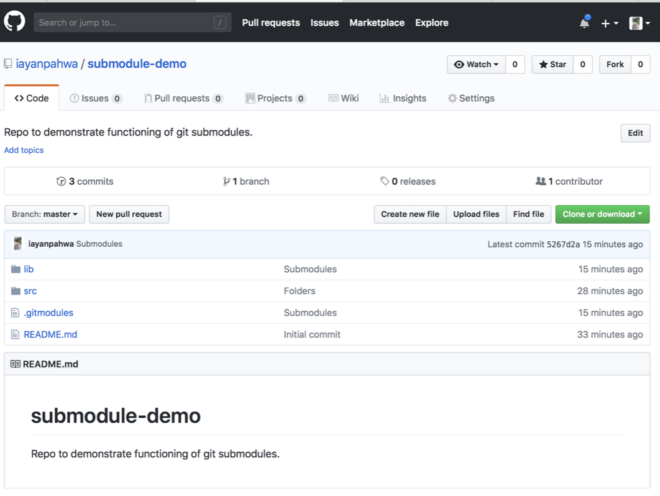
Let’s walk through a practical example. Imagine a project named “submodule-demo” that relies on two libraries:

  • FastLED: A library for controlling LEDs
  • PubSubClient: A library for implementing an MQTT client
Git Submodules

Here’s how to leverage git-submodules to manage these dependencies:

  1. Project Structure: You can create a dedicated directory (e.g., lib) within your project to store dependencies.
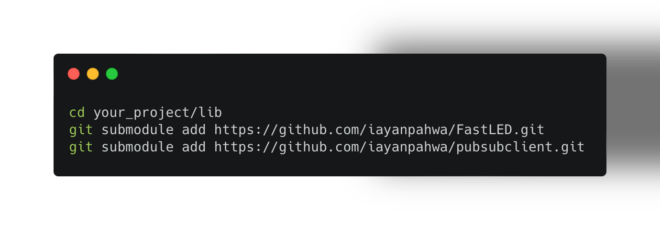
  2. Adding Submodules: Use the git submodule add command to specify the URL of the external repository and the desired submodule path:
cd your_project/lib
git submodule add https://github.com/iayanpahwa/FastLED.git
git submodule add https://github.com/iayanpahwa/pubsubclient.git
Git Submodules

This fetches the code from the specified repositories and stores them within the lib directory.

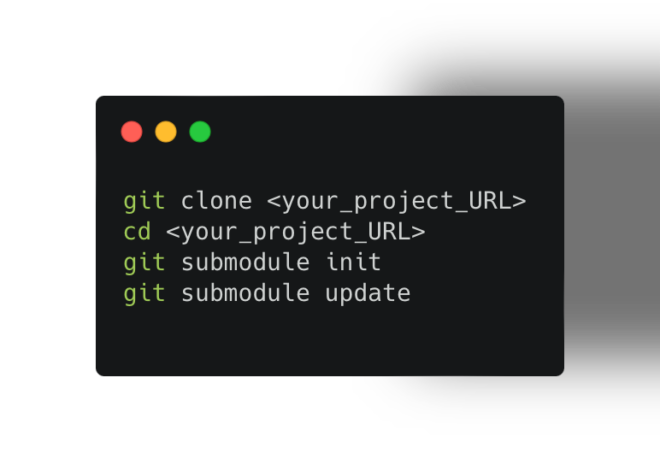
3. Initialising and Updating: Anyone cloning your project can easily initialise and update the submodules using the following commands:

git clone <your_project_URL>
cd <your_project_URL>
git submodule init
git submodule update
Git Submodules

Alternatively, you can use the --recursive flag during cloning to automate these steps:

git clone --recursive <your_project_URL>
Git Submodules

4. Version Control: Git submodules record the specific commit hash used from each dependency. This ensures everyone working on the project uses the same library version, promoting consistency and preventing compatibility issues.

Beyond the Basics:

While submodules default to fetching the latest commit from the dependency’s main branch, you can specify a different branch or commit hash. Refer to the official Git documentation (https://git-scm.com/book/en/v2/Git-Tools-Submodules) for details on advanced usage.

Key Takeaways

By embracing git submodules, you can effectively manage dependencies, improve code organization, and streamline project collaboration. This approach promotes a more modular and maintainable codebase, saving you time and headaches in the long run.

Feel free to explore our other blog posts on Git internals for further insights!

Git Internals Part 1- List of basic Concepts That Power your .git Directory

Git Internals Part 2: How does Git store your data?

Git Internals Part 3: Understanding the staging area in Git

NEW Developer Nation survey is live! Participate, shape the trends in software development, and win big. Start here!